

The Patch Tab is where you tell Miranda what kind of fixtures you are using and how many there.
Downloading your show file will automatically load it in the Programmer. Once you have downloaded (or loaded) your show file, you will be able to see the Miranda device(s) in your project when you go to the Patch tab.
It is possible to shift Miranda devices between projects if needed in the Miranda Management Portal when you sign into your account, but not here in Patch. Adding a Miranda in Patch is for Local Only Projects.
Patch Interface
Miranda’s Patch view is simple and to the point. There are three columns, though one doesn’t appear until you select a fixture or controller.
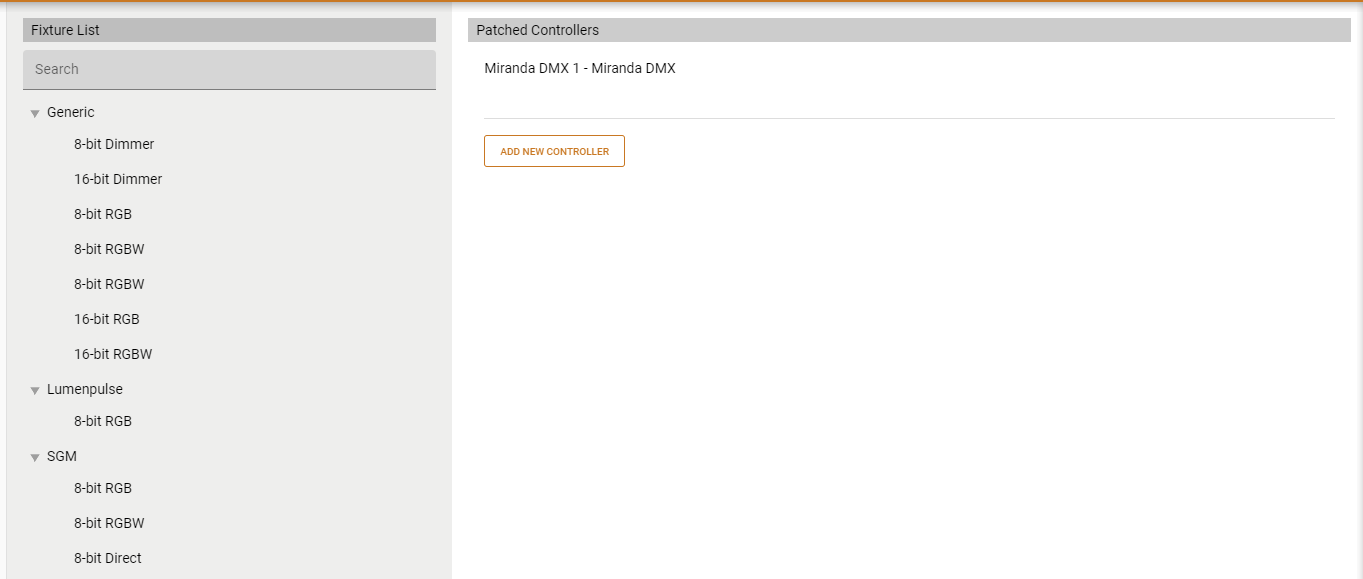
Fixture List: A selection of profiles you can add to your show.
Patched Controllers: Where Mirandas and Fixtures are added.
Controller Properties: This appears when you select anything in the Patched Controllers column. All assignments and naming are done here.
Miranda Controller Properties
In the Patched Controllers column are the Miranda devices that Ben Peoples Industries has added to your project. If you click on a controller, the Controller Properties window appears.

Label: The name you assign your Miranda.
Profile: There are two profiles, Miranda DMX and Miranda Touch (Touch is discontinued). Always select Miranda DMX.
Location: An additional field you may enter useful information into, such as where on the job site this device is located for servicing. This information appears in the Miranda Management Portal as well.
Access Notes: This information only appears here. If you need to provide sensitive data (a contact name and number to gain access to the Miranda, for instance) this information does not show up anywhere else.
MAC Address: MAC address for your Miranda. Do not edit without approval from Ben Peoples Industries.
Adding Fixtures
As you add fixtures, they are placed below the controller.
As an example, let’s add an 8 bit RGBW fixture to the show. This is done by clicking and dragging “8-bit RGBW” below the controller. When you select the fixture, the Fixture Properties window appears to show information about the fixture.
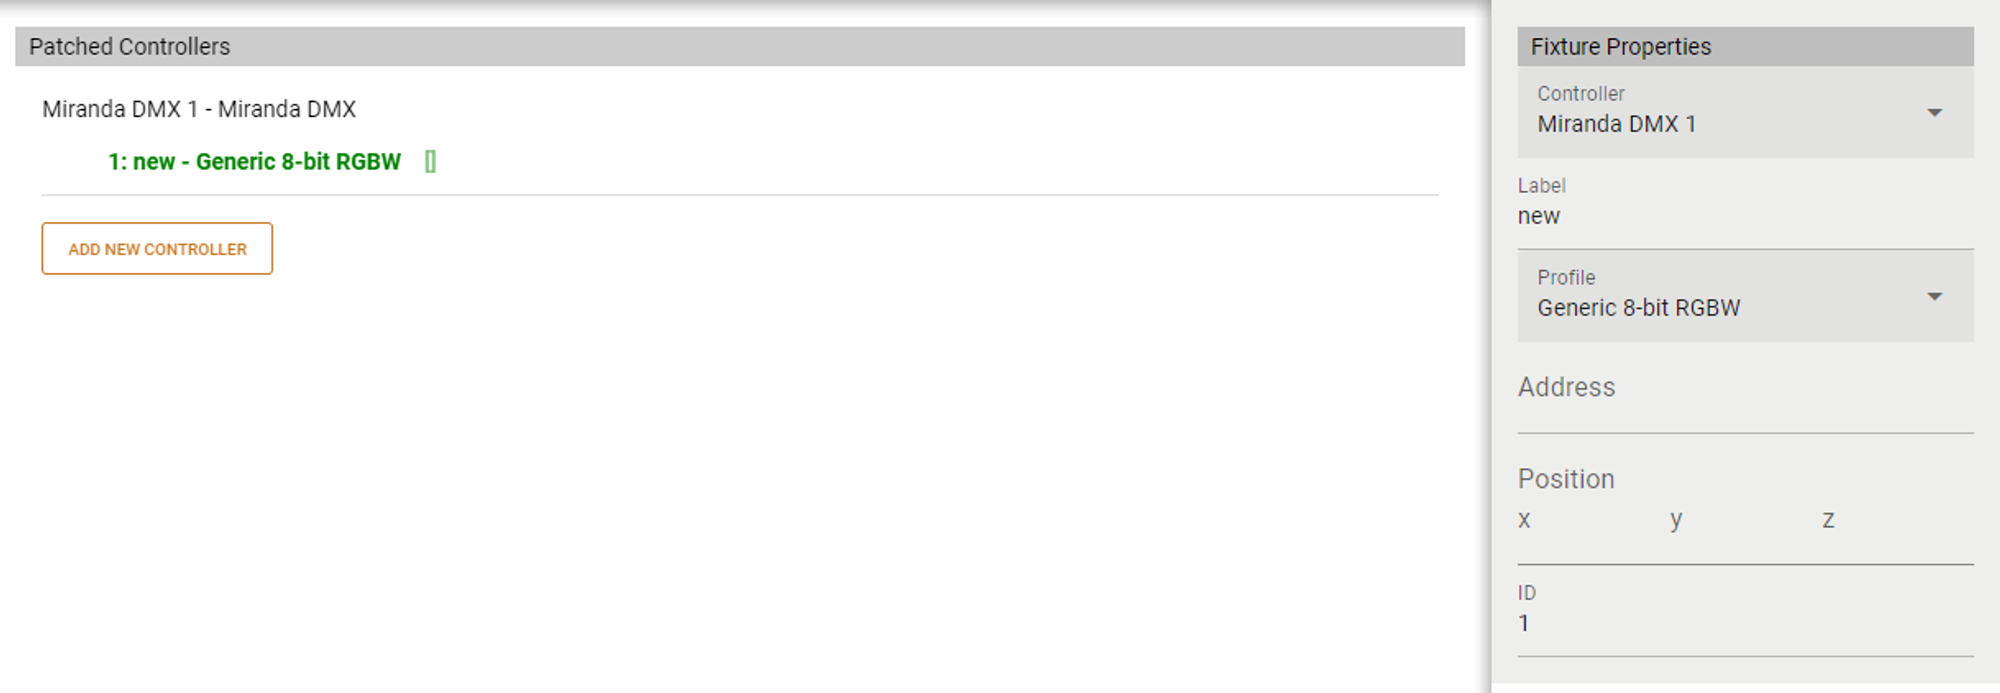
Controller: At the Top of the Fixture Properties column, you can select from the pull-down menu which Miranda you want to control your light.
Label: A field to label or name fixtures.
Profile: A pull-down menu that allows you to choose a new profile for your fixture.
Changing fixture profiles may require you to re-address your fixtures to prevent overlapping addresses.
Address: The DMX start address for your fixture. As each Miranda can output two universes of control, you will need to set your addresses between 1 and 1024.
You don’t need to specify the end address, thanks to the profile. If you choose an 8-bit RGB LED and set a start address of 1, Miranda knows that the next two addresses are taken by this fixture: 1=R, 2=G, 3=B.
Position: Enter X, Y and Z positioning values here. Though you may input this data now, this is tied to a feature that is not yet fully implemented. As we add features, this data will be helpful to create effects that are spatially aware.
ID: The numerical identifier for your fixture. Sometimes referred to as “Channels”. A number will be assigned automatically, but you can renumber at any time.
Patch Workflow Tools
Selection: Selecting fixtures by range can be done by clicking the first fixture, holding Shift and selecting the last fixture.
Multiple fixtures can also be selected one at a time by holding Control on Windows or Command on Mac.
Modifiers: Right-clicking on any item in the Patched Controllers column will bring up useful options.
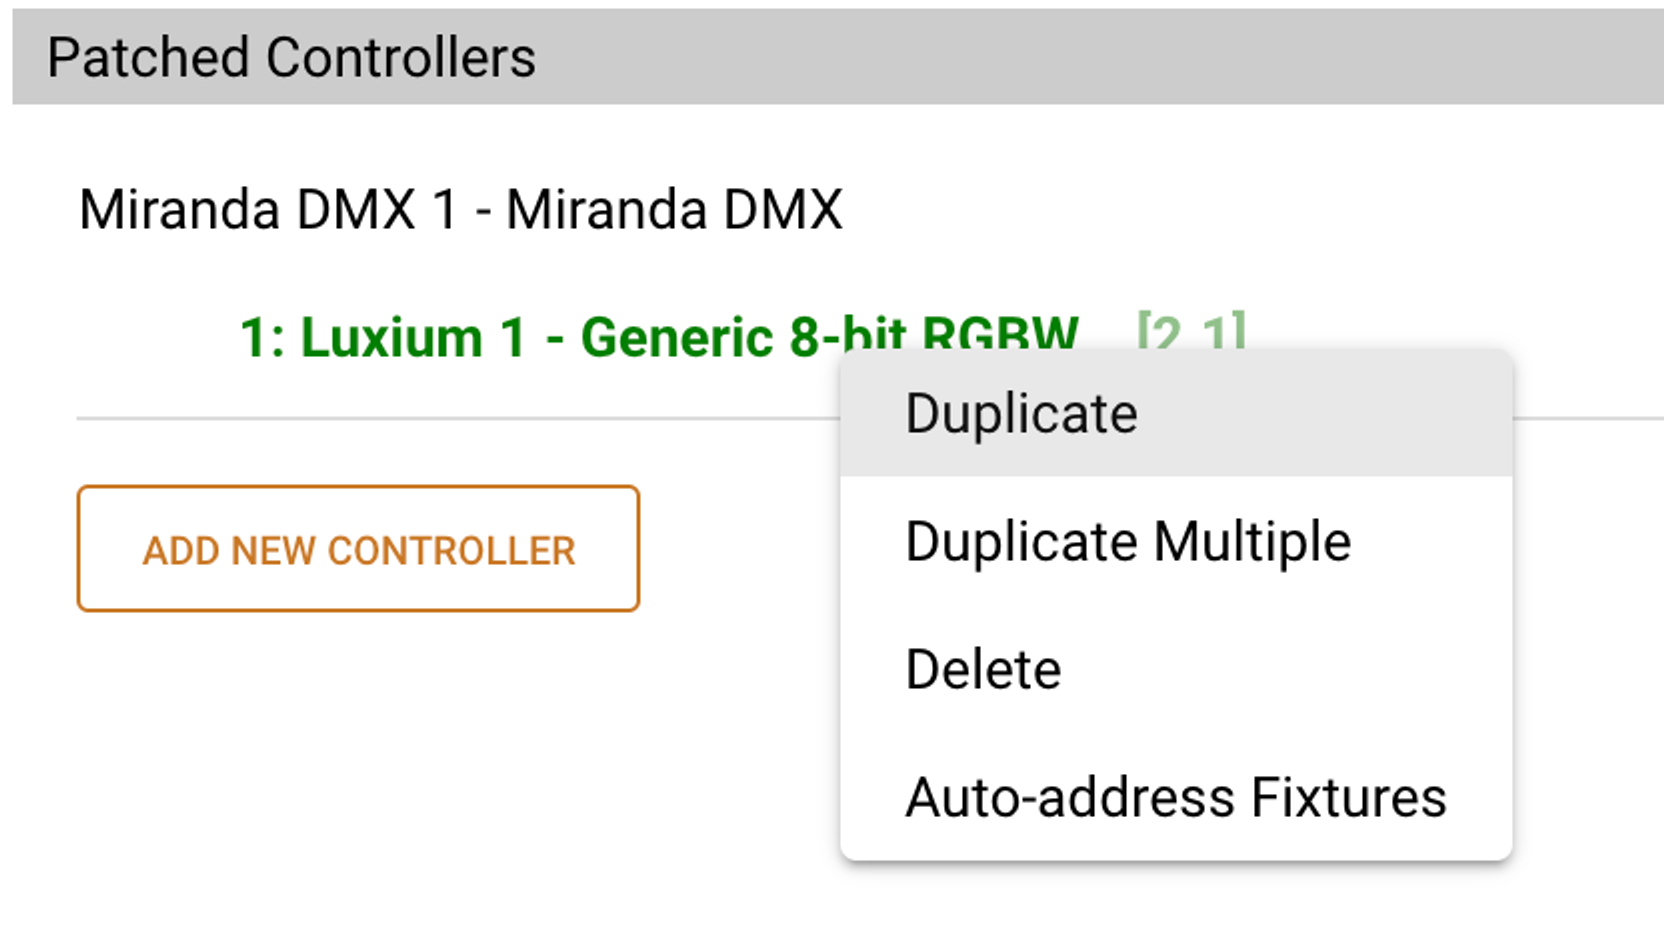
Duplicate: Duplicates the selection except for ID number, which will rise by one value.
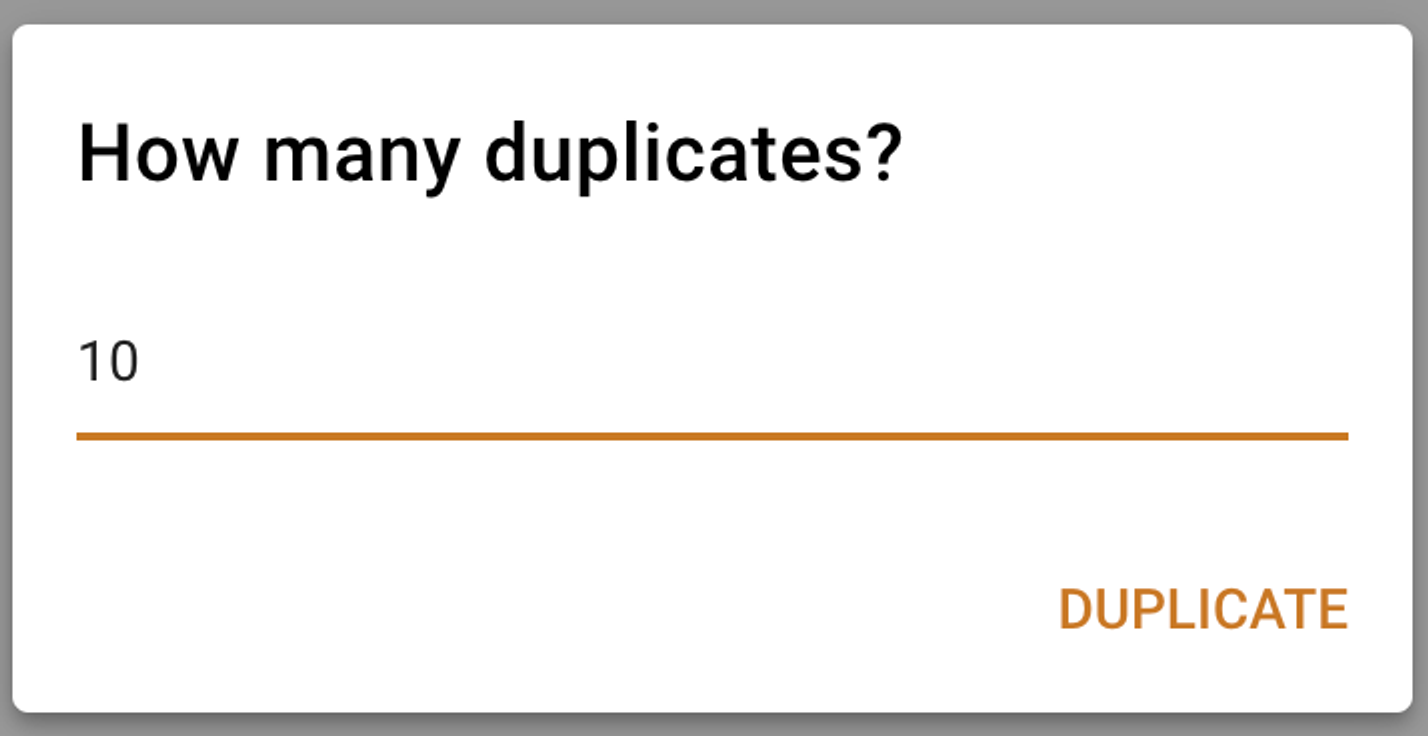
Duplicate Multiple: Same as Duplicate, but the User selects how many to make at one time. It defaults to 2, but the user can choose any number.
Delete: Can delete one or a range of items.
Auto-address Fixtures: Select multiple fixtures and auto-address them continuously.
Numbering will either continue from the address of the first selection or will default to start at 1.
Warning: not specifying your start address on the first fixture can result in double-patched fixtures, which Miranda will flash in a red warning at the top of the screen. You will need to fix your patch manually.
Local-Only Projects: Add New Controller
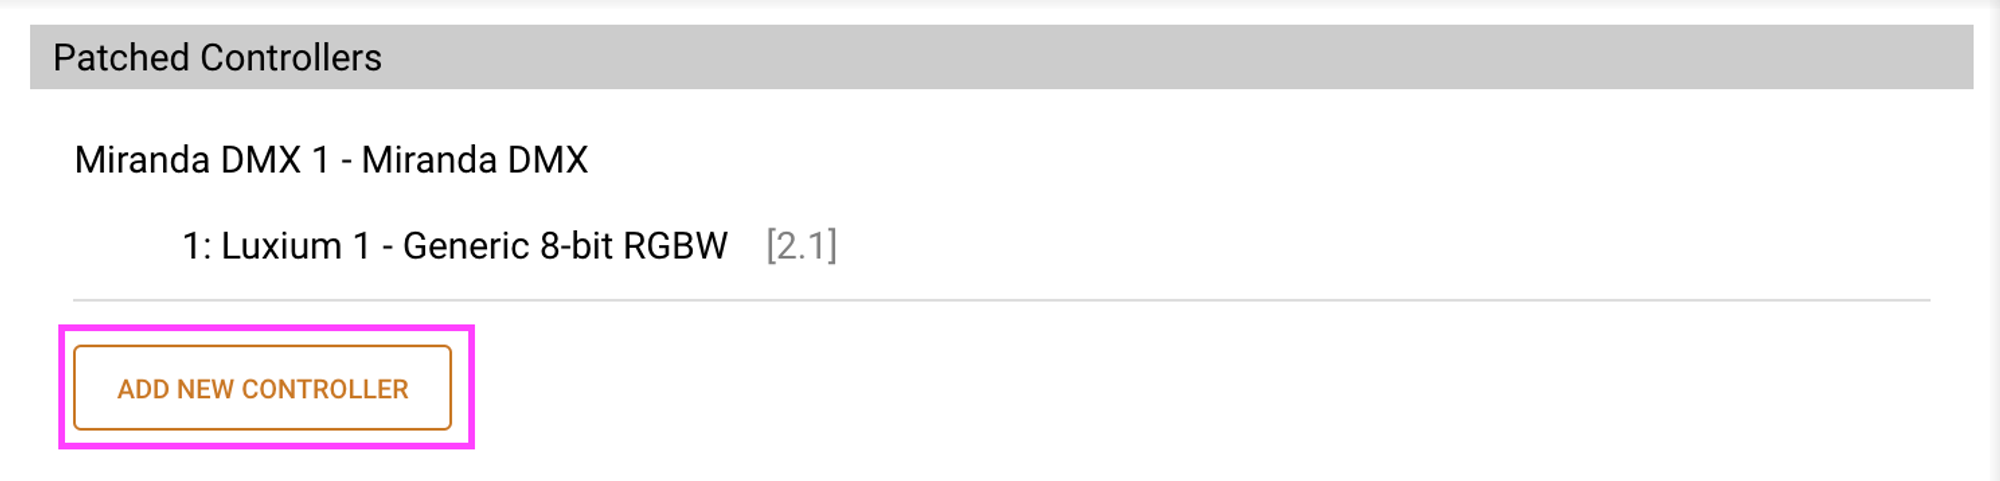
Add Miranda to show file after using Connect Locally in the Cloud Tab. Click the Add New Controller button and the programmer will add whatever Miranda is networked to the Miranda Programmer.
Local-Only Projects only support one controller.