
1. What’s in the Box?
A standard Ganymede unit includes:
- Ganymede unit with white or black buttons
- Single-gang faceplate of matching color
Power supplies are not included standard, but are available separately!
2. Set Your Computer’s Subnet
Set your computer IP to be on the same subnet as Ganymede’s default IP address (10.1.0.20) and subnet (255.255.0.0).
We recommend using 10.1.0.21, but any address in that subnet will work.
Power Ganymede with either a PoE switch or a 12-48v power supply.
We don’t recommend using the USB-C connector on the back to power the unit, but it can be used in a temporary/emergency situation. Never use the USB-C port for power in any mission critical situation.
4. Sign In
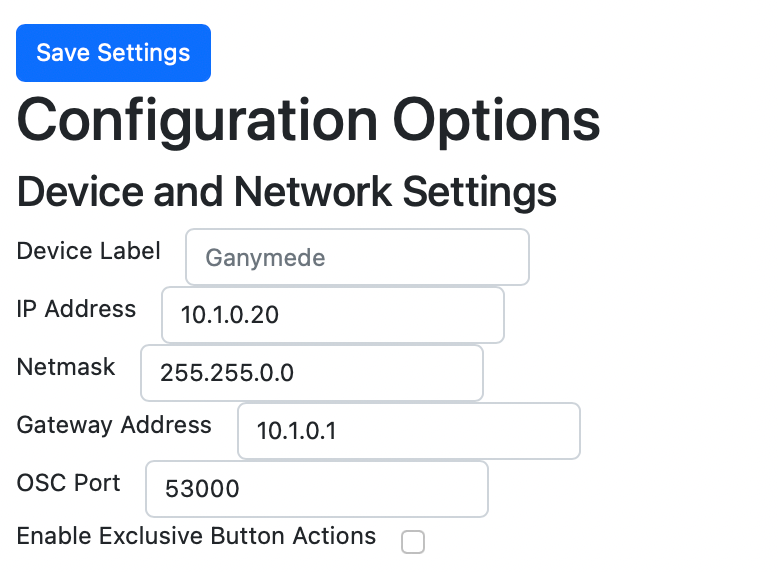
Sign into Ganymede by opening a browser and typing in 10.1.0.20 where you would normally type a web address.

If necessary, change the IP address to suit your IP scheme. Press Save Settings.
6. Reconnect (only needed if you’ve completed Step 5)
Reconnect to Ganymede using your browser again (as in Step 4), but using your chosen IP address. If you have changed the subnet, you may need to reconfigure your computer’s IP address.

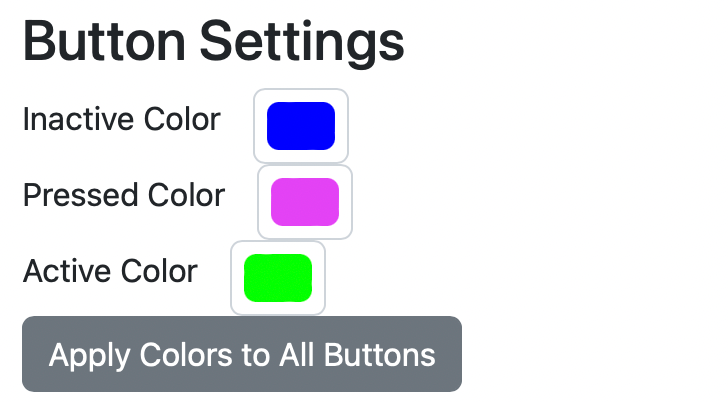
If you always want the same button action colors, set them under Button Settings and hit Apply Colors to All Buttons.
To set colors for individual buttons and states, see the detailed instructions in the Ganymede User Manual.
Use this panel to set your IP defaults (the IP addresses of your primary and secondary console, for instance).
You can also set the ports where your consoles receive String or OSC commands.
When settings are configured, press Apply IP Setting to All Buttons.

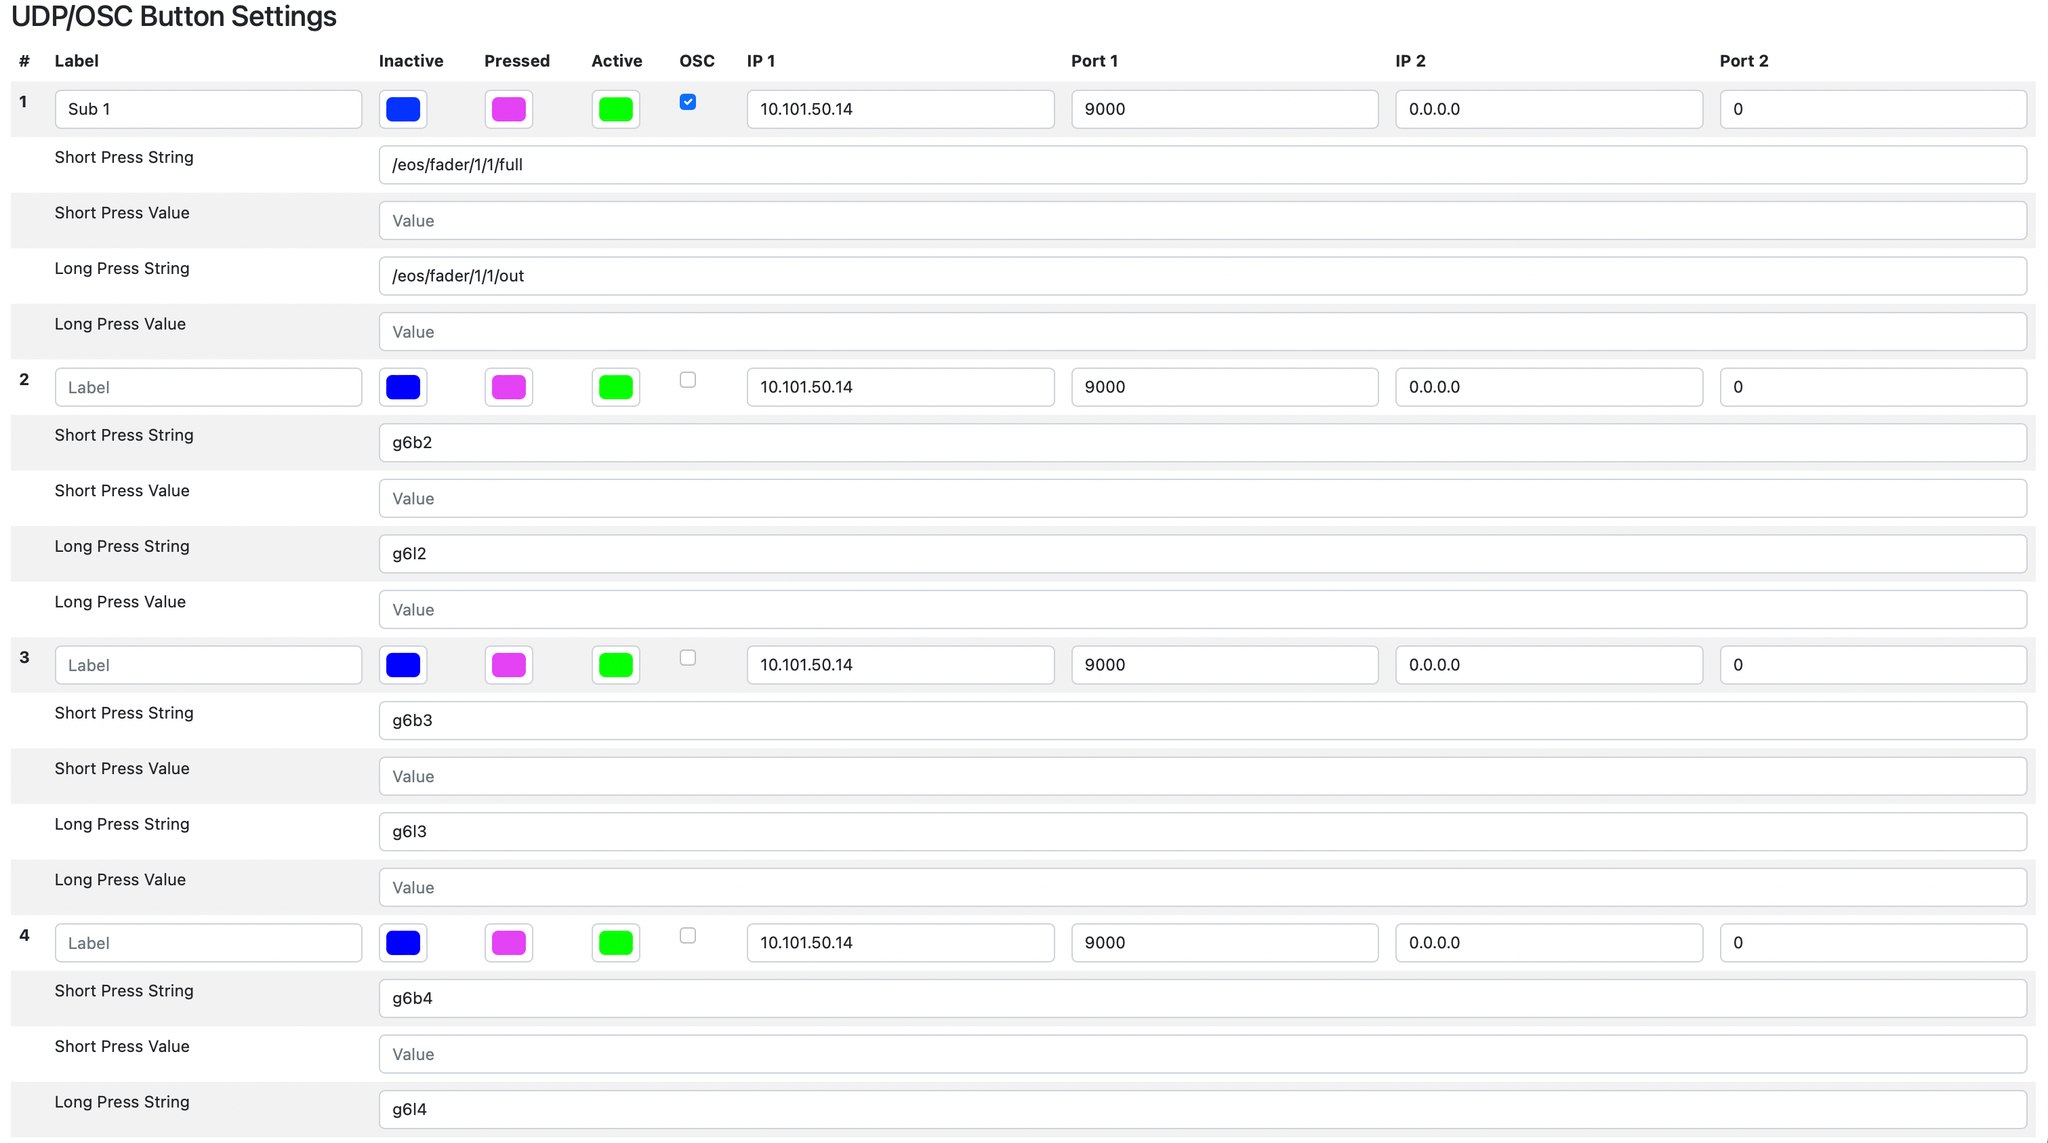
Use this page to enter labels, choose custom button colors, and specify IP addresses for primary and secondary recipients, along with selecting OSC if applicable.
For each button, enter the short press (on) and long press (off) strings for both primary and secondary controllers. Repeat this process for all buttons.
10. Save Settings
Each time you press Save Settings, all data is pushed to Ganymede. Don’t forget this step!
