
1. What’s in the Box?
A standard Rosalind Lite unit includes:
- Rosalind Lite unit with white or black buttons
- Single-gang faceplate of matching color
Power supplies are not included standard, but are available separately!
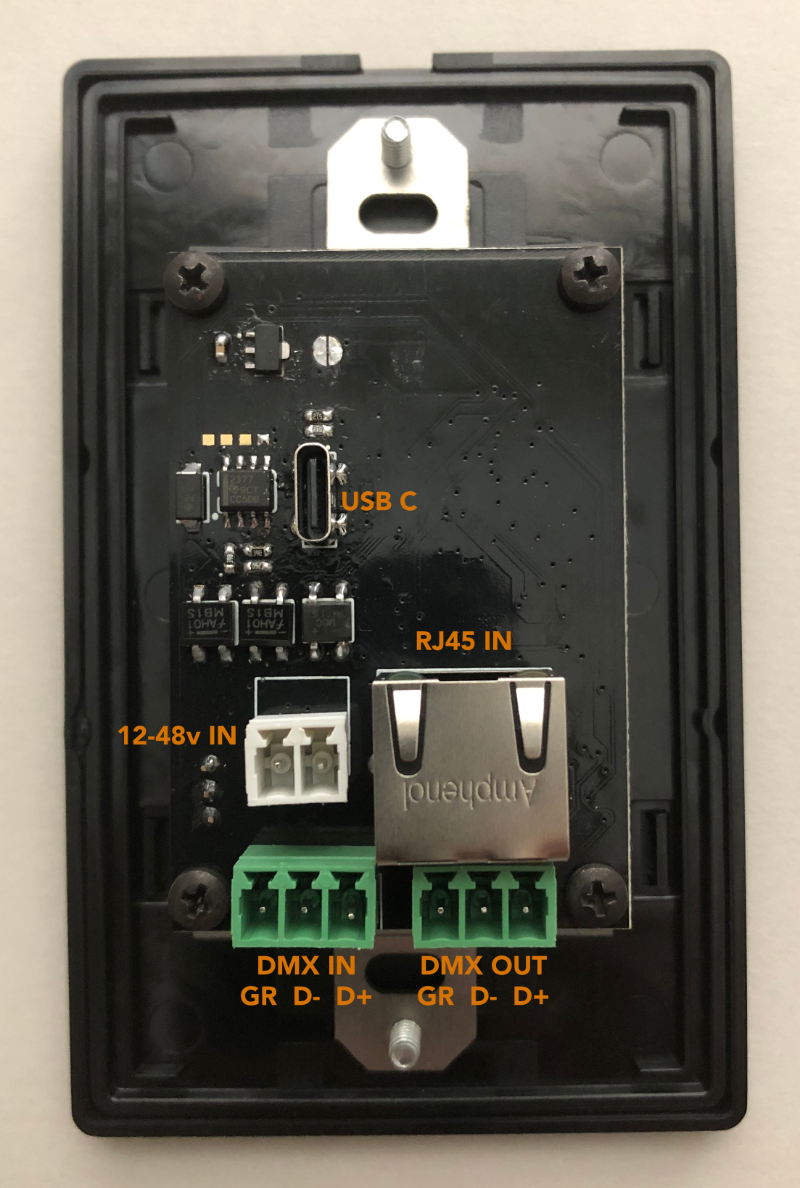
2. Connect Power
Power Rosalind Lite with any 12-48v power supply.
You can temporarily power the Rosalind with the USB-C connector on the back, but powering the device this way is not recommended for any sort of mission critical use.
3. Connect DMX
Connect the input and output DMX lines as needed. (Note: the Rosalind Lite does not have an RJ45 connector on the back of it)
4. Enable Programming Mode
Press and hold the 3,4,5 and 6 buttons (you can push your finger at the 4-corners intersection between them) until the four button LEDs turn yellow, about 1 second. When you release them, all 8 buttons will be blinking in program mode.
5. Create and Save Snapshots
Each button must be programmed individually, using the following steps:
- Create a look using any DMX controller.
- Long press the flashing button until it changes from the pressed color to a yellow color, then release - this will record the preset to that button, and the button will stop programming.
Repeat this process for each button that needs to be programmed.
If you do not wish to program all 8 snapshots right now, you can power cycle the device to exit programming mode.
See the detailed manual for RDM instructions for setting modes, changing colors, locking out programming, and programming individual buttons.